Monday, November 26, 2012

How To Add Line Numbers in Eclipse

0 comments
By adding line numbers in eclipse, it makes a little easier to debug , find and fix errors in your project.

  • To add line numbers Eclipse -> Window -> Preferences 
  • Select General -> Editors -> Text Editors and tick on Show line numbers

how to add line numbers in eclipse
Read more...

Tuesday, November 13, 2012

AsyncTask Android example | AsyncTask in Android

13 comments
In this tutorial you will learn how to use AsyncTask in your application. This AsyncTask class perform background operations and update the results on the UI

AsyncTask has three generic type
  • Params, the type of the parameters sent to the task upon execution.
  • Progress, the type of the progress units published during the background computation.
  • Result, the type of the result of the background computation

Private class ShowDialogAsyncTask extends 
        AsyncTask<Params, Progress, Result>{....}


AsyncTask goes through 4 steps

  • onPreExecute(),invoked on the UI thread immediately after the task is executed.
  •  doInBackground(Paaram ...),invoked on the background thread immediately after onPreExecute() finishes executing.
  • onProgressUpdate(Progress...) invoked on the UI thread after a call to publishProgress(Progress...).
  •  onPostExecute(Result), invoked on the UI thread after the background computation finishes. 


Android AcyncTask Example Android ProgressBar

AsyncTaskActivity


package com.javasrilankansupport.asynctask;

import android.os.AsyncTask;
import android.os.Bundle;
import android.os.SystemClock;
import android.app.Activity;
import android.view.View;
import android.widget.Button;
import android.widget.ProgressBar;
import android.widget.TextView;
import android.widget.Toast;


public class AsyncTaskActivity extends Activity {

 Button btn_start;
 ProgressBar progressBar;
 TextView txt_percentage;
    @Override
    public void onCreate(Bundle savedInstanceState) {
        super.onCreate(savedInstanceState);
        setContentView(R.layout.activity_async_task);
        
        btn_start = (Button) findViewById(R.id.btn_start);
        progressBar =  (ProgressBar) findViewById(R.id.progress);
        txt_percentage= (TextView) findViewById(R.id.txt_percentage);
        
        btn_start.setOnClickListener(new View.OnClickListener() {
   
   @Override
   public void onClick(View v) {
    
    btn_start.setEnabled(false);
    new ShowDialogAsyncTask().execute();
   }
  });
    }

    
    private class ShowDialogAsyncTask extends AsyncTask<Void, Integer, Void>{

     int progress_status;
     
     @Override
  protected void onPreExecute() {
   // update the UI immediately after the task is executed
   super.onPreExecute();
   
    Toast.makeText(AsyncTaskActivity.this,
            "Invoke onPreExecute()", Toast.LENGTH_SHORT).show();

    progress_status = 0;
    txt_percentage.setText("downloading 0%");
   
  }
     
  @Override
  protected Void doInBackground(Void... params) {
   
   while(progress_status<100){
    
    progress_status += 2;
    
    publishProgress(progress_status);
    SystemClock.sleep(300);
    
   }
   return null;
  }
 
  @Override
  protected void onProgressUpdate(Integer... values) {
   super.onProgressUpdate(values);
   
   progressBar.setProgress(values[0]);
   txt_percentage.setText("downloading " +values[0]+"%");
   
  }
  
  @Override
  protected void onPostExecute(Void result) {
   super.onPostExecute(result);
   
    Toast.makeText(AsyncTaskActivity.this,
            "Invoke onPostExecute()", Toast.LENGTH_SHORT).show();
    
    txt_percentage.setText("download complete");
    btn_start.setEnabled(true);
  }
    }
}


activity_async_task.xml

<RelativeLayout xmlns:android="http://schemas.android.com/apk/res/android"
    xmlns:tools="http://schemas.android.com/tools"
    android:layout_width="match_parent"
    android:layout_height="match_parent" >

    <TextView
        android:id="@+id/textView1"
        android:layout_width="wrap_content"
        android:layout_height="wrap_content"
        android:layout_alignParentTop="true"
        android:layout_centerHorizontal="true"
        android:padding="@dimen/padding_medium"
        android:text="@string/async_task"
        tools:context=".AsyncTaskActivity" />

    <ProgressBar
        android:id="@+id/progress"
        style="?android:attr/progressBarStyleHorizontal"
        android:layout_width="match_parent"
        android:layout_height="wrap_content"
        android:layout_below="@+id/textView1"
        android:layout_marginTop="34dp" />

    <Button
        android:id="@+id/btn_start"
        android:layout_width="wrap_content"
        android:layout_height="wrap_content"
        android:layout_below="@+id/progress"
        android:layout_centerHorizontal="true"
        android:layout_marginTop="40dp"
        android:minWidth="120dp"
        android:text="@string/start_btn" />

    <TextView
        android:id="@+id/txt_percentage"
        android:layout_width="wrap_content"
        android:layout_height="wrap_content"
        android:layout_alignParentLeft="true"
        android:layout_below="@+id/progress"
        android:text="downloading  0%"
        android:textAppearance="?android:attr/textAppearanceMedium" />

</RelativeLayout>


Download AsyncTask Android example


You may also like 


Read more...

Sunday, October 7, 2012

Android Dialog - Android Custom Dialog

8 comments
In this tutorial I am going to describe how to create Android Custom Dialg which is for user login, you may have any customized android layout.

Android Dialog

Android  Dialog - Custom Dialog for User Login


 Create Android Project  AndroidDialog ;  File -> New -> Android Project

Android Layout

activity_android_dialog.xml


<RelativeLayout xmlns:android="http://schemas.android.com/apk/res/android"
    xmlns:tools="http://schemas.android.com/tools"
    android:layout_width="match_parent"
    android:layout_height="match_parent" >

    <Button
        android:id="@+id/btn_launch"
        android:layout_width="wrap_content"
        android:layout_height="wrap_content"
        android:layout_alignParentTop="true"
        android:layout_centerHorizontal="true"
        android:layout_marginTop="115dp"
        android:text="Launch Dialog" />

    <TextView
        android:id="@+id/textView1"
        android:layout_width="wrap_content"
        android:layout_height="wrap_content"
        android:layout_alignParentLeft="true"
        android:layout_alignParentTop="true"
        android:layout_marginLeft="28dp"
        android:layout_marginTop="54dp"
        android:text="@string/app_desc"
        android:textAppearance="?android:attr/textAppearanceLarge" />
    
</RelativeLayout>


Dialog Layout

dialog_layout.xml


<?xml version="1.0" encoding="utf-8"?>
<LinearLayout xmlns:android="http://schemas.android.com/apk/res/android"
    android:layout_width="fill_parent"
    android:layout_height="fill_parent"
    android:orientation="vertical"
    android:padding="10sp" >

    <EditText
        android:id="@+id/txt_name"
        android:layout_width="fill_parent"
        android:layout_height="wrap_content"
        android:hint="@string/dialog_uname"
        android:singleLine="true" >

        <requestFocus />
    </EditText>

    <EditText
        android:id="@+id/password"
        android:layout_width="match_parent"
        android:layout_height="wrap_content"
        android:ems="10"
        android:inputType="textPassword" >
    </EditText>

    <RelativeLayout
        android:layout_width="match_parent"
        android:layout_height="wrap_content" >

        <Button
            android:id="@+id/btn_login"
            android:layout_width="120dp"
            android:layout_height="wrap_content"
            android:text="@string/dialog_submit" />

        <Button
            android:id="@+id/btn_cancel"
            android:layout_width="120dp"
            android:layout_height="wrap_content"
            android:layout_alignParentTop="true"
            android:layout_marginLeft="10dp"
            android:layout_toRightOf="@+id/btn_login"
            android:text="@string/dialog_cancel" />
    </RelativeLayout>

</LinearLayout>


AndroidDialog   Activity


Android  Dialog - Custom Dialog


Override both onCreateDialog(int id) and onPrepareDialog(int id, Dialog dialog) methods and add following code which will create your custom Android Dialog.


import android.os.Bundle;
import android.view.LayoutInflater;
import android.view.View;
import android.widget.Button;
import android.widget.EditText;
import android.widget.Toast;
import android.app.Activity;
import android.app.AlertDialog;
import android.app.Dialog;

public class AndroidDialog extends Activity {

 final private static int DIALOG_LOGIN = 1;

 @Override
 public void onCreate(Bundle savedInstanceState) {
  super.onCreate(savedInstanceState);
  setContentView(R.layout.activity_android_dialog);

  Button launch_button = (Button) findViewById(R.id.btn_launch);

  launch_button.setOnClickListener(new View.OnClickListener() {

   @Override
   public void onClick(View v) {
    showDialog(DIALOG_LOGIN);
   }
  });
 }

 @Override
 protected Dialog onCreateDialog(int id) {

  AlertDialog dialogDetails = null;

  switch (id) {
  case DIALOG_LOGIN:
   LayoutInflater inflater = LayoutInflater.from(this);
   View dialogview = inflater.inflate(R.layout.dialog_layout, null);

   AlertDialog.Builder dialogbuilder = new AlertDialog.Builder(this);
   dialogbuilder.setTitle("Login");
   dialogbuilder.setView(dialogview);
   dialogDetails = dialogbuilder.create();

   break;
  }

  return dialogDetails;
 }

 @Override
 protected void onPrepareDialog(int id, Dialog dialog) {

  switch (id) {
  case DIALOG_LOGIN:
   final AlertDialog alertDialog = (AlertDialog) dialog;
   Button loginbutton = (Button) alertDialog
     .findViewById(R.id.btn_login);
   Button cancelbutton = (Button) alertDialog
     .findViewById(R.id.btn_cancel);
   final EditText userName = (EditText) alertDialog
     .findViewById(R.id.txt_name);
   final EditText password = (EditText) alertDialog
     .findViewById(R.id.password);

   loginbutton.setOnClickListener(new View.OnClickListener() {

    @Override
    public void onClick(View v) {
     alertDialog.dismiss();
     Toast.makeText(
       AndroidDialog.this,
       "User Name : " + userName.getText().toString()
         + "  Password : "
         + password.getText().toString(),
       Toast.LENGTH_LONG).show();
    }
   });

   cancelbutton.setOnClickListener(new View.OnClickListener() {

    @Override
    public void onClick(View v) {
     alertDialog.dismiss();
    }
   });
   break;
  }
 }
}


Download Android Custom Dialog Eclipse project 
Read more...

Wednesday, July 18, 2012

How to Check Android Network / Internet Connectivity Status

6 comments

It is not complex to Check Android Network / Internet Connectivity Status, bellow DetectConnection class
will help you to check Android Network / Internet Connectivity Status. Here I am going to load Android Wireless & Network Setting if device is not connected to any Network.


check network  internet connection in android


CheckConnectionActivity Activity will load Wireless & Network Setting if your Android device is not connected to the Network.


package com.jsupport;

import android.os.Bundle;
import android.provider.Settings;
import android.view.View;
import android.widget.Button;
import android.widget.Toast;
import android.app.Activity;
import android.content.Intent;

public class CheckConnectionActivity extends Activity {

 @Override
 public void onCreate(Bundle savedInstanceState) {
  super.onCreate(savedInstanceState);
  setContentView(R.layout.check_connection);

  Button check_connection = (Button) findViewById(R.id.btn_checkConnection);

  check_connection.setOnClickListener(new View.OnClickListener() {

   @Override
   public void onClick(View v) {
    if (DetectConnection
      .checkInternetConnection(CheckConnectionActivity.this)) {
     Toast.makeText(CheckConnectionActivity.this,
       "You have Internet Connection", Toast.LENGTH_LONG)
       .show();
    } else {
     Toast.makeText(CheckConnectionActivity.this,
       "You Do not have Internet Connection",
       Toast.LENGTH_LONG).show();

     CheckConnectionActivity.this.startActivity(new Intent(
       Settings.ACTION_WIRELESS_SETTINGS));
    }
   }
  });
 }
}


Create DetectConnection class

Context.getSystemService(Context.CONNECTIVITY_SERVICE)
which will gives the Network information, network availability and the connectivity status of the device


package com.jsupport;

package com.jsupport;

import android.content.Context;
import android.net.ConnectivityManager;

public class DetectConnection {

 public static boolean checkInternetConnection(Context context) {

  ConnectivityManager con_manager = (ConnectivityManager) context
    .getSystemService(Context.CONNECTIVITY_SERVICE);

  if (con_manager.getActiveNetworkInfo() != null
    && con_manager.getActiveNetworkInfo().isAvailable()
    && con_manager.getActiveNetworkInfo().isConnected()) {
   return true;
  } else {
   return false;
  }
 }
}


Add following permission to your AndroidManifest.xml to allow internet connection and to access Network Settings


< uses-permission android:name="android.permission.INTERNET" />
< uses-permission android:name="android.permission.ACCESS_NETWORK_STATE" />


AndroidManifest.xml


how to check network internet connection in android
launch android wirless and networks seting


You may also like 


Read more...

Monday, June 18, 2012

Send Data to Another Activity - Simple Android Login

5 comments
In this article you will learn how to send data from one Activity  to another Activity,I created two activity AndroidLoginActivity and LoginSuccess, in the LoinSuccess Activity will display logged user name.


Add OnClickListener to Button and Send Data to next Activity


// Set OnClickListner to the login button 
Button login = (Button) findViewById(R.id.btn_login);

login.setOnClickListener(new View.OnClickListener() {

 @Override
 public void onClick(View v) {
  // Get user Name
  EditText loginName = (EditText) findViewById(R.id.txt_userName);
  String name = loginName.getText().toString();

  // create Intent and set LoginSuccess Activity 
  Intent intent = new Intent(getApplicationContext(),
    LoginSuccess.class);

  // put values to intent which will get in the LoginSuccess    Activity
 
  intent.putExtra("name", name);

  // Start LoginSuccess Activity 
  startActivity(intent);

 }
});


Create AndroidLoginActivity 

Right the project and create Java class and name it as AndroidLoginActivity, copy and past bellow code.


package jsupport.com;

import android.app.Activity;
import android.content.Intent;
import android.os.Bundle;
import android.view.View;
import android.widget.Button;
import android.widget.EditText;

public class AndroidLoginActivity extends Activity {
    /** Called when the activity is first created. */
    @Override
    public void onCreate(Bundle savedInstanceState) {
        super.onCreate(savedInstanceState);
        setContentView(R.layout.login);
       
     /* Set OnClickListner to the login button */
        Button login = (Button) findViewById(R.id.btn_login);
        
        login.setOnClickListener(new View.OnClickListener() {
   
   @Override
   public void onClick(View v) {
    
    EditText loginName = (EditText) findViewById(R.id.txt_userName);  
    String  name  = loginName.getText().toString();
    
    Intent intent  = new Intent(getApplicationContext(),LoginSuccess.class);
    
    intent.putExtra("name", name);
    
    startActivity(intent);
     
   }
  });
    }
}


Create new layout  for AndroidLoginActivity


Android Login


Right click on res/layout , New-> Android XML give the file name as login , copy and past bellow xml


<?xml version="1.0" encoding="utf-8"?>
<LinearLayout xmlns:android="http://schemas.android.com/apk/res/android"
    android:orientation="vertical"
    android:layout_width="fill_parent"
    android:layout_height="fill_parent"
    >
    <TextView android:text="Login here" android:textAppearance="?android:attr/textAppearanceLarge" android:id="@+id/textView1" android:layout_height="wrap_content" android:layout_width="180dp" ></TextView>
    <TextView android:text="User Name " android:textAppearance="?android:attr/textAppearanceMedium" android:id="@+id/textView2" android:layout_height="wrap_content" android:layout_width="126dp"></TextView>
    <EditText android:layout_height="wrap_content" android:id="@+id/txt_userName" android:layout_width="272dp">
        <requestFocus></requestFocus>
    </EditText>
    <TextView android:text="Password" android:textAppearance="?android:attr/textAppearanceMedium" android:id="@+id/textView3" android:layout_width="wrap_content" android:layout_height="wrap_content"></TextView>
    <EditText android:layout_height="wrap_content" android:inputType="textPassword" android:id="@+id/password" android:layout_width="272dp"></EditText>
    <Button android:text="Login" android:layout_height="wrap_content" android:layout_width="126dp" android:id="@+id/btn_login" ></Button>
</LinearLayout>


Get Value from Intent


/* Get values from Intent */
 Intent intent =  getIntent();
        
 String name    =  intent.getStringExtra("name");


Create LoginSuccess Activity 


Right the project and create Java class and name it as  LoginSuccess  , copy and past bellow code.


package jsupport.com;


import android.app.Activity;
import android.content.Intent;
import android.os.Bundle;
import android.widget.TextView;

public class LoginSuccess extends Activity {

 public void onCreate(Bundle savedInstanceState) {
        super.onCreate(savedInstanceState);
        setContentView(R.layout.success);
        
        TextView txt_loggedName = (TextView) findViewById(R.id.txt_loggedName);
        
        /* Get values from Intent */
        Intent intent = getIntent();
        
        String name  = intent.getStringExtra("name");
        
        txt_loggedName.setText(name);
 }
}


Create new layout  for LoginSuccess 


Simple Android Login for beginners


Right click on res/layout , New-> Android XML give the file name as success, copy and past bellow xml

<?xml version="1.0" encoding="utf-8"?>
<LinearLayout
  xmlns:android="http://schemas.android.com/apk/res/android"
  android:orientation="vertical"
  android:layout_width="wrap_content"
  android:layout_height="wrap_content" android:weightSum="1">
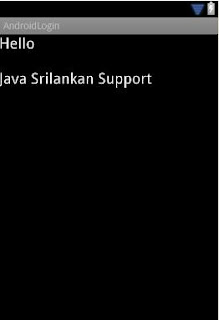
    <TextView android:text="Hello" android:textAppearance="?android:attr/textAppearanceLarge" android:id="@+id/textView1" android:layout_width="158dp" android:layout_height="wrap_content" android:layout_weight="0.06"></TextView>
    <TextView android:text="Java Srilankan Support" android:textAppearance="?android:attr/textAppearanceLarge" android:layout_height="wrap_content" android:layout_width="match_parent" android:id="@+id/txt_loggedName"></TextView>
    
</LinearLayout>


Add AndroidLoginActivity and LoginSuccess  to AndroidManifest.xml


<?xml version="1.0" encoding="utf-8"?>
<manifest xmlns:android="http://schemas.android.com/apk/res/android"
      package="jsupport.com"
      android:versionCode="1"
      android:versionName="1.0">
    <uses-sdk android:minSdkVersion="8" />

    <application android:icon="@drawable/icon" android:label="@string/app_name">
        <activity android:name=".AndroidLoginActivity"
                  android:label="@string/app_name">
            <intent-filter>
                <action android:name="android.intent.action.MAIN" />
                <category android:name="android.intent.category.LAUNCHER" />
            </intent-filter>
        </activity>
        <activity android:name="LoginSuccess"></activity>

    </application>
</manifest>

AndroidLoginActivity   is the main activity


Download application source code from here  Simple Android Login
Read more...

Friday, June 15, 2012

Create Dynamic JButton with Image and ActionListener - Java Swing

0 comments
In this tutorial you will learn how to create JButton dynamically with Image and the ActionListener . You will be able to change the button height , width horizontal gap and vertical gap in one place.

I have create dummy database class which will return the Main menu items and the Sub menu items.You will see the Main menu item in your JFrame. If you select main Item (FOOD) from the button panel it will load Sub Items from the dummy database class (sub items of the FOOD)


Here are the screen shots

Main menu items


Sub menu items


Create Main Frame


Open NetBeans and create New Project, name it as
DynamicButton

  • Add New JFrame Form give class name as DynamicSwingButton
  • Add these code to your DynamicSwingButton class and import relevant classes and interfaces
  private final static int button_width   =   145;        // button width
private final static int button_height = 140; // button height
private final static int horizontalGap = 10; // horizontal gap in button
private final static int verticalGap = 10; // verticle gap in button
private final static int numberOfColumns= 4; // number of colums in the button panel
private final static int fontSize = 11; // font size of button name
private final static int fontType = Font.BOLD; // font type
private final static String fontName = "Thoma"; // font name
private final static Color fontColor = new Color(0, 51, 255); // font colot

  • Add Scroll Pane to your Frame from the palette and set the height and width to Scroll Pane
  • Add JPanel to the Scroll Pane and change the panel variable name as pnl_button
  • Add bellow function to your DynamicSwingButton class
    private void addMainMenue() {

pnl_button.removeAll();
repaint();

Image img, sub;
ImageIcon icon;
String imagePath,imag = "/com/images/";

ArrayList menue = new ArrayList();
ArrayList itemName = new ArrayList();

for (int size = 0 ; size<ItemDB.mainMenuCodes.length; size++) {
menue.add(ItemDB.mainMenuCodes[size]);
itemName.add(ItemDB.mainMenuDesc[size]);
}

JButton[] buttons = new JButton[menue.size()];

for (int i = 0; i < buttons.length; i++) {

imagePath = imag+menue.get(i).toString()+".jpeg";

URL url = getClass().getResource(imagePath);
// System.out.println(imagePath +" Get Res : " +getClass().getResource(imagePath));

if(url!=null){
img = Toolkit.getDefaultToolkit().getImage(url);
sub = img.getScaledInstance(button_width - 8, button_height - 30, Image.SCALE_FAST);
icon = new ImageIcon(sub);
}
else
icon = new ImageIcon();

buttons[i] = new JButton(itemName.get(i).toString(), icon);
buttons[i].setVerticalTextPosition(AbstractButton.BOTTOM);
buttons[i].setHorizontalTextPosition(AbstractButton.CENTER);

buttons[i].setBorder(javax.swing.BorderFactory.createEtchedBorder());
buttons[i].setFont(new java.awt.Font("Tahoma", 1, 13));
buttons[i].setForeground(new java.awt.Color(0, 51, 255));

buttons[i].setActionCommand(menue.get(i).toString());
buttons[i].addActionListener(new ActionListener() {

public void actionPerformed(ActionEvent e) {
String choice = e.getActionCommand();
addSubmenue(choice);
}
});
}

int b = 0;
int vGap = verticalGap;
int hGap = horizontalGap;
int bLength = buttons.length;
int bRows = bLength/numberOfColumns +1;

L1: for (int j = 0; j <bRows; j++) {
vGap = 10;
for (int k = 0; k < numberOfColumns; k++) {

pnl_button.add(buttons[b], new org.netbeans.lib.awtextra.AbsoluteConstraints(vGap, hGap, button_width, button_height));
repaint();
vGap +=button_width+verticalGap;
b++;
if(b>=bLength){
break L1;
}
}
hGap +=button_height+horizontalGap;
}
pack();
}

private void addSubmenue(String choice) {
pnl_button.removeAll();
repaint();

Image img, sub;
ImageIcon icon;
String imagePath,imag = "/com/images/";

ArrayList menue = new ArrayList();
ArrayList itemName = new ArrayList();

ArrayList list = ItemDB.getSubMenu(choice);
String subCode[] = (String[]) list.get(0);
String subDesc[] = (String[]) list.get(1);

for (int size = 0 ; size<subCode.length; size++) {
menue.add(subCode[size]);
itemName.add(subDesc[size]);
}

JButton[] buttons = new JButton[menue.size()];

for (int i = 0; i < buttons.length; i++) {

imagePath = imag+menue.get(i).toString()+".jpeg";

URL url = getClass().getResource(imagePath);
// System.out.println(imagePath +" Get Reso : " +getClass().getResource(imagePath));

if(url!=null){
img = Toolkit.getDefaultToolkit().getImage(url);
sub = img.getScaledInstance(button_width - 8, button_height - 30, Image.SCALE_FAST);
icon = new ImageIcon(sub);
}
else
icon = new ImageIcon();


buttons[i] = new JButton(itemName.get(i).toString(), icon);
buttons[i].setVerticalTextPosition(AbstractButton.BOTTOM);
buttons[i].setHorizontalTextPosition(AbstractButton.CENTER);

buttons[i].setBorder(javax.swing.BorderFactory.createEtchedBorder());
buttons[i].setFont(new java.awt.Font("Tahoma", 1, 13));
buttons[i].setForeground(new java.awt.Color(0, 51, 255));


buttons[i].setActionCommand(menue.get(i).toString());
buttons[i].addActionListener(new ActionListener() {

public void actionPerformed(ActionEvent e) {
String choice = e.getActionCommand();
addItems(choice);
}
});
}
int b = 0;
int vGap = verticalGap;
int hGap = horizontalGap;
int bLength = buttons.length;
int bRows = bLength/numberOfColumns +1;

L1: for (int j = 0; j <bRows; j++) {
vGap = 10;
for (int k = 0; k < numberOfColumns; k++) {

pnl_button.add(buttons[b], new org.netbeans.lib.awtextra.AbsoluteConstraints(vGap, hGap, button_width, button_height));
repaint();
vGap +=button_width+verticalGap;
b++;
if(b>=bLength){
break L1;
}
}
hGap +=button_height+horizontalGap;
}
pack();
}

private void addItems(String choice) {

if(choice.equals("P"))
choice = "PIZZA";
else if(choice.equals("B"))
choice = "BURGER";
else if(choice.equals("FJ"))
choice = "FRUIT JUICE";
else if(choice.equals("HB"))
choice = "HOT BEVERAGES";
JOptionPane.showMessageDialog(this, "You have select "+choice);
}


  • Go to Window->Navigating-> Inspector, Right Click your Frame and add window open event


  • Add this function to windows opened event
    addMainMenue();

  • Add tow buttons and name one as Back and another as Exit
  • Select Back button and add Action performed event with addMainMenue(); function
  • Select Exit button and add Action performed event with System.exit(0);
  • Add this dummy database class to your project


import java.util.ArrayList;

/**
*
* @author JSupport
*/
class ItemDB {

public static String mainMenuCodes[] = {"FOOD","BEVE","FOOD","BEVE","FOOD","BEVE"};
public static String mainMenuDesc[] = {"FOOD","BEVERAGES","FOOD","BEVERAGES","FOOD","BEVERAGES"};
private static ArrayList list;

public static ArrayList getSubMenu(String mainMenuCodes){

list = new ArrayList();
if(mainMenuCodes.equals("FOOD")){
String subCode[] = {"P","B"};
String subDesc[] = {"PIZZA","BURGER"};

list.add(subCode);
list.add(subDesc);

}else if(mainMenuCodes.equals("BEVE")){
String subCode[] = {"FJ","HB"};
String subDesc[] = {"Fruit Juice","Hot Beverages"};

list.add(subCode);
list.add(subDesc);
}
return list;
}
}

  • Run the DynamicSwingButton frame.

Read more...

Friday, June 8, 2012

Install Android application on Android Device

1 comments

APK Creation in Eclipse and Install on Android Device


In this tutorial you will be learn how to install developed Android application on your Android Device. You must know the correct Android Version of your device before you going to create APK file.Here I am going to install previous Android ListView example with Image and Text  application on android device.

Device is Cisco Cius and the Android Version is 2.2.2 

Android list view on cisco cius


Check API Levels 

Open your android AndroidListView  project in eclipse , you may download it from here AndroidListView. Go to the application property and select android on left pane. Select android version of your device

android project properties


Change the  SDK API Level     <uses-sdk android:minSdkVersion="8" />      according to your version


AndroidManifest.xml


Export Android Application and Create APK file 

Right click on the project and click on Export and select Export Android Application

Export Android Application in Eclipse


Export Android Application in Eclipse


Click next and select create new keystore give the name with location for key, give password and click next.

create android key


Fill required fields in the next screen and give the destination for APK file and finish it.

android key creation

Create Android APK and Install on Android Device


Allow Installation of non-Market Application


Now you create the APK file and it is ready to install on your Android Device. Your android device may give the permission to install your application. Select Unknown Source  Go to Setting -> Application Setting  ->Unknown Source and tick check box which will allow to install non-market application on your device.

Copy APK file to your SD card and insert it to your device, install it and run.


Read more...

Thursday, June 7, 2012

Synthetica Look And Feel Java Swing

19 comments

How to Apply Synthetica Look And Feel to JFrame in Netbeans


Here I am going to explain how to apply Synthetica Look And Feel to a JFrame in Netbeans,in the previous tutorial I was explained how to apply Nimbus Look and Feel Java Swing to a JFrame.You will be able to apply

  • SyntheticaSkyMetallicLookAndFeel
  • SyntheticaBlueMoonLookAndFeel
  • SyntheticaBlueIceLookAndFeel
  • SyntheticaWhiteVisionLookAndFeel
  • and SystemLookAndFeel which will your OS look and feel.
To apply Synthetica look and feel you must add Synthetica libraries to your project class path.

This code will remove your current look and feel which will help to apply new look and feel clearly.

UIManager.removeAuxiliaryLookAndFeel(UIManager.getLookAndFeel());

To apply new look and feel you must use this code snip which will update all Component with new look and feel

SwingUtilities.updateComponentTreeUI(this);


Look and Feel change function


private void changeLookandFeel() {
        try {

            UIManager.removeAuxiliaryLookAndFeel(UIManager.getLookAndFeel());
            SyntheticaLookAndFeel.setWindowsDecorated(false);
            UIManager.setLookAndFeel(UIMANAGER_STRING);

//             for (int i = 0; i < LookAndFeel.getFrames().length; ++i) {
//                SwingUtilities.updateComponentTreeUI(LookAndFeel.getFrames()[i]);
//                SwingUtilities.updateComponentTreeUI(this);
//            }
            SwingUtilities.updateComponentTreeUI(this);

        } catch (Exception ex) {
            try {
                UIManager.setLookAndFeel(UIManager.getSystemLookAndFeelClassName());
            } catch (Exception e) {
                e.printStackTrace();
            }
        }
    }

Synthetica Blue Moon Look And Feel

Synthetica Blue Moon Look And Feel

Synthetica Blue Moon Look And Feel


Synthetica White Vision Look And Feel

Synthetica White Vision Look And Feel

Synthetica White Vision Look And Feel


System Look And Feel (Windows 7)

System Look And Feel (Windows 7 Look And Feel)


Synthetica Sky Metallic Look And Feel

Synthetica Sky Metallic Look And Feel

Synthetica Sky Metallic Look And Feel


Synthetica Blue Ice Look And Feel

Synthetica Blue Ice Look And Feel

SyntheticaBlueIceLookAndFeel


Download the Netbean project from here Synthetica Look and Feel, you will be find libraries in the lib folder

 
Look And Feel Netbeans Project
Read more...

Tuesday, June 5, 2012

Nimbus Look and Feel Java Swing

4 comments
It is very easy to apply  Nimbus Look and Feel which was introduced in Java SE 6 update 10 release. Copy and past following code before creating the (GUI) Graphical User Interface


Nimbus Look and Feel

nimbus look and feel

Before Applying the Nimbus Look and Feel

Java Look and Feel


try {
            UIManager.setLookAndFeel("com.sun.java.swing.plaf.nimbus.NimbusLookAndFeel");
            
        } catch (Exception ex) {
            // If the nibus is not available, GUI will set to the system's look and feel  
            UIManager.setLookAndFeel(UIManager.getSystemLookAndFeelClassName());
        }
Read more...

Monday, May 14, 2012

Send Email in Java Mail API using Gmail SMTP Server

7 comments
To send email using java you must have mail server and user name and password to access the mail server. In this tutorial I used gmail SMTP server with SSL connection. You must add Java Mail API to your class path.


package jsupport.mail;

import java.util.Properties;
import javax.mail.Authenticator;
import javax.mail.Message;
import javax.mail.Message.RecipientType;
import javax.mail.MessagingException;
import javax.mail.PasswordAuthentication;
import javax.mail.Session;
import javax.mail.Transport;
import javax.mail.internet.InternetAddress;
import javax.mail.internet.MimeMessage;

/**
 *
 * @author Java Srilankan Support - JSupport
 */
public class SendMail {
    
    public void sendMail(String m_from,String m_to,String m_subject,String m_body){

      try {

            m_properties     = new Properties();
            m_properties.put("mail.smtp.host", "smtp.gmail.com"); 
            m_properties.put("mail.smtp.socketFactory.port", "465");
            m_properties.put("mail.smtp.socketFactory.class","javax.net.ssl.SSLSocketFactory");
            m_properties.put("mail.smtp.auth", "true");
            m_properties.put("mail.smtp.port", "465");
            

            m_Session        =   Session.getDefaultInstance(m_properties,new Authenticator() {
                protected PasswordAuthentication getPasswordAuthentication() {
                    return new PasswordAuthentication("username","password"); // username and the password
                }

            });
            
            m_simpleMessage  =   new MimeMessage(m_Session);

            m_fromAddress    =   new InternetAddress(m_from);
            m_toAddress      =   new InternetAddress(m_to);


            m_simpleMessage.setFrom(m_fromAddress);
            m_simpleMessage.setRecipient(RecipientType.TO, m_toAddress);
            m_simpleMessage.setSubject(m_subject);
            m_simpleMessage.setContent(m_body,"text/plain");

            Transport.send(m_simpleMessage);

        } catch (MessagingException ex) {
            ex.printStackTrace();
        }
    }

    public static void main(String[] args) {

      SendMail send_mail    =   new SendMail();
      send_mail.sendMail("from-mail@gmail.com", "to-mail@gmail.com", "Test Mail", "Hi this is Test mail from Java Srilankan Support");
    }

    private Session m_Session;
    private Message m_simpleMessage;
    private InternetAddress m_fromAddress;
    private InternetAddress m_toAddress;
    private Properties m_properties;
}
Read more...

Android ListView example with Image and Text

36 comments

Android ListView


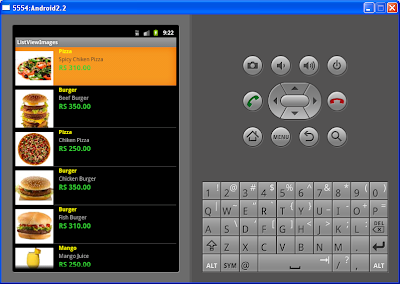
This tutorial I am going to show you how to create Android ListView with images and text. you will be find how to load image from the resources and how to set text to TextView. Here is the screen shot of ListView.


Android List View Example


Android List View example on Samsung Galaxy Y s5360

Android List View example on Samsung Galaxy Y s5360.jpg


ItemDetails class, which is help to set item data and you will be get data from the ItemDetails


package com.jsupport.listviewimages;

public class ItemDetails {

public String getName() {
return name;
}
public void setName(String name) {
this.name = name;
}
public String getItemDescription() {
return itemDescription;
}
public void setItemDescription(String itemDescription) {
this.itemDescription = itemDescription;
}
public String getPrice() {
return price;
}
public void setPrice(String price) {
this.price = price;
}
public int getImageNumber() {
return imageNumber;
}
public void setImageNumber(int imageNumber) {
this.imageNumber = imageNumber;
}

private String name ;
private String itemDescription;
private String price;
private int imageNumber;


}


ItemListBaseAdapter


which is extend from the BaseAdapter and set item details and the image 


package com.jsupport.listviewimages;

import java.util.ArrayList;


import android.content.Context;
import android.view.LayoutInflater;
import android.view.View;
import android.view.ViewGroup;
import android.widget.BaseAdapter;
import android.widget.ImageView;
import android.widget.TextView;

public class ItemListBaseAdapter extends BaseAdapter {
 private static ArrayList<ItemDetails> itemDetailsrrayList;
 
 private Integer[] imgid = {
   R.drawable.p1,
   R.drawable.bb2,
   R.drawable.p2,
   R.drawable.bb5,
   R.drawable.bb6,
   R.drawable.d1
   };
 
 private LayoutInflater l_Inflater;

 public ItemListBaseAdapter(Context context, ArrayList<ItemDetails> results) {
  itemDetailsrrayList = results;
  l_Inflater = LayoutInflater.from(context);
 }

 public int getCount() {
  return itemDetailsrrayList.size();
 }

 public Object getItem(int position) {
  return itemDetailsrrayList.get(position);
 }

 public long getItemId(int position) {
  return position;
 }

 public View getView(int position, View convertView, ViewGroup parent) {
  ViewHolder holder;
  if (convertView == null) {
   convertView = l_Inflater.inflate(R.layout.item_details_view, null);
   holder = new ViewHolder();
   holder.txt_itemName = (TextView) convertView.findViewById(R.id.name);
   holder.txt_itemDescription = (TextView) convertView.findViewById(R.id.itemDescription);
   holder.txt_itemPrice = (TextView) convertView.findViewById(R.id.price);
   holder.itemImage = (ImageView) convertView.findViewById(R.id.photo);

   convertView.setTag(holder);
  } else {
   holder = (ViewHolder) convertView.getTag();
  }
  
  holder.txt_itemName.setText(itemDetailsrrayList.get(position).getName());
  holder.txt_itemDescription.setText(itemDetailsrrayList.get(position).getItemDescription());
  holder.txt_itemPrice.setText(itemDetailsrrayList.get(position).getPrice());
  holder.itemImage.setImageResource(imgid[itemDetailsrrayList.get(position).getImageNumber() - 1]);

  return convertView;
 }

 static class ViewHolder {
  TextView txt_itemName;
  TextView txt_itemDescription;
  TextView txt_itemPrice;
  ImageView itemImage;
 }
}


ListViewImagesActivity


package com.jsupport.listviewimages;

import java.util.ArrayList;

import android.app.Activity;
import android.os.Bundle;
import android.view.View;
import android.widget.AdapterView;
import android.widget.ListView;
import android.widget.Toast;
import android.widget.AdapterView.OnItemClickListener;

public class ListViewImagesActivity extends Activity {
/** Called when the activity is first created. */
@Override
public void onCreate(Bundle savedInstanceState) {
super.onCreate(savedInstanceState);
setContentView(R.layout.main);

ArrayList<ItemDetails> image_details = GetSearchResults();

final ListView lv1 = (ListView) findViewById(R.id.listV_main);
lv1.setAdapter(new ItemListBaseAdapter(this, image_details));

lv1.setOnItemClickListener(new OnItemClickListener() {
@Override
public void onItemClick(AdapterView<?> a, View v, int position, long id) {
Object o = lv1.getItemAtPosition(position);
ItemDetails obj_itemDetails = (ItemDetails)o;
Toast.makeText(ListViewImagesActivity.this, "You have chosen : " + " " + obj_itemDetails.getName(), Toast.LENGTH_LONG).show();
} 
});
}

private ArrayList<ItemDetails> GetSearchResults(){
ArrayList<ItemDetails> results = new ArrayList<ItemDetails>();

ItemDetails item_details = new ItemDetails();
item_details.setName("Pizza");
item_details.setItemDescription("Spicy Chiken Pizza");
item_details.setPrice("RS 310.00");
item_details.setImageNumber(1);
results.add(item_details);

item_details = new ItemDetails();
item_details.setName("Burger");
item_details.setItemDescription("Beef Burger");
item_details.setPrice("RS 350.00");
item_details.setImageNumber(2);
results.add(item_details);

item_details = new ItemDetails();
item_details.setName("Pizza");
item_details.setItemDescription("Chiken Pizza");
item_details.setPrice("RS 250.00");
item_details.setImageNumber(3);
results.add(item_details);

item_details = new ItemDetails();
item_details.setName("Burger");
item_details.setItemDescription("Chicken Burger");
item_details.setPrice("RS 350.00");
item_details.setImageNumber(4);
results.add(item_details);

item_details = new ItemDetails();
item_details.setName("Burger");
item_details.setItemDescription("Fish Burger");
item_details.setPrice("RS 310.00");
item_details.setImageNumber(5);
results.add(item_details);

item_details = new ItemDetails();
item_details.setName("Mango");
item_details.setItemDescription("Mango Juice");
item_details.setPrice("RS 250.00");
item_details.setImageNumber(6);
results.add(item_details);


return results;
}
}

Download complete project here Android ListView


Read more...

Friday, April 20, 2012

First Android Application in Eclipse Hello world Android Example

0 comments
Android hello world example


In this tutorial, I am going show you how to create your very first Android Application.First of all you need to Setup Android Development Environment, visit How to setup Android Development Environment in With Eclipse, to setup your How to setup android development environment.


Create Android Project


Start Eclipse, File -> New -> Android Project and input Application name, Build Target which is your android OS platform and the Package name under properties and finish.Eclipse will create all unnecessary configuration and files to your project application.


New Android Project
First Android Project


Modify the Activity class


Find the activity class FirstAndroidAppActivity.java under src, and modify as bellow


package com.firstapp;

import android.app.Activity;
import android.os.Bundle;
import android.widget.TextView;

public class FirstAndroidAppActivity extends Activity {

/** Called when the activity is first created. */
@Override
public void onCreate(Bundle savedInstanceState) {
super.onCreate(savedInstanceState);
TextView text = new TextView(this);
text.setText("Hello Java Srilankan Support");
setContentView(R.layout.main);
}
}

Run as Android Application

You will see "Hello Java Srilankan Support" on the virtual device (AVD)


Run as Android Application


Android Virtual Device (AVD)


In home you will be see your FirstAndroidApp


Read more...

Wednesday, April 4, 2012

How To Setup Android Application Development Environment

29 comments
Android Development Environment in Eclipse

It is very easy to set up Android Development Environment on Eclipse. First of all you need to download the tools and software. You must download followings

  • Java SE Development Kite (JDK 5 or newer)
  • Eclipse IDE for Java Developer
  • Android Software Development Kit

Setup Java

To setup java in your computer you must download java from the oracle site here is the download link
http://www.oracle.com/technetwork/java/javase/downloads/index.html


Oracle Java Development kit JDK 7


Java SE Development Kite 7 and then select Accept License Agreement and select your windows platform also


Download Oracle Java


Oracle Java Development kit JDK 7


You are not require to do any changes when you are going to install JDK, just install it in normal way.


Setup Eclipse IDE

Download Eclipse IDE for Java Developer from the eclipse.org and extract the downloaded file.
Eclipse is not require to installation, just run the Eclipse.exe


Download Eclipse IDE for Java Developer


Setup Android Software Development Kit (SDK)

Download Android SDK from http://developer.android.com/sdk/index.html and extract the downloaded file and run the SDK Manager


Download Android Software Development kit


Install Android Software Development kit


  • Select Available packages from the left pane and then select any android sdk platform you wish to develop from the right pane, it will take time to complete.
  • Click Install Selected


Download Available Android Software Development kit packeges


  • In the popup select Accept All and Click Install


Install Available Android SDK packeges


Create Android Virtual Device (AVD) on Android SDK

After installation complete select Virtual Device in the left pane and then click NEW in right pane.


Create Android Virtual Device on Android SDK


  • Enter a name to your Android Virtual Device
  • Select target Android version from the Target drop down box
  • Give the size of SD card and then click Create AVD
  • It will take time to create Android Virtual Device (AVD)


Create New Android Virtual Device  on Android SDK


Configure Installed Android with Eclipse


Run the Eclipse ......

  • First run of Eclipse it will ask the default workplace, you must be mention the default workplace folder
  • Go to the Help -- Install New Software

Add Android to Eclipse


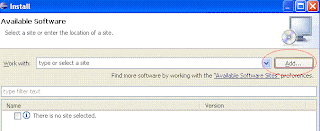
  • Click Add button in install window to install Android Developer Tool

Add Android to Eclipse 2


  • Name it as Android
  • Add Location as http://dl-ssl.google.com/android/eclipse/ and do OK
Developer Tool of Android on Eclipse


  • After click OK, in the next popup box Select Developer Tools and click Next and accept license agreement and finish it


  • Eclipse IDE will gives you a warning message saying Your installation software that contains unsigned content ...... just OK and restart your Eclipse IDE

  • Eclipse Warning

Restart Eclipse


  • Now you need to give the Android SDK location to the popup which will be display when Eclipse IDE restart
  • When the Eclipse IDE starts there will be a configuration popup which will ask the Android SDK location
  • Select Use existing SDK and then browse the Android SDK location and finish
Add Android SDK location to Eclipse


Now your Android development Environment is ready for development. Start your First Android Application in Eclipse Hello world Android Example

Read more...